Essential Tools for Wood Floor Installation
Installing a wood floor requires more than attractive flooring materials and careful measurements. The right tools help installers make accurate cuts, create secure joints, prepare the subfloor, and achieve a clean, professional finish. Whether you are considering a wood floor installation service or planning a hardwood project yourself, understanding the equipment involved can help you appreciate what goes into a quality installation. From measuring tools and saws to nailers, spacers, and finishing equipment, each tool has a specific purpose. Using the wrong tool can lead to uneven boards, damaged flooring, gaps, or unnecessary material waste. Knowing what tools are needed also makes it easier to discuss your project with a professional installer and understand why certain preparation steps are necessary. In this guide, we’ll look at the essential tools used during hardwood floor installation and explain how they contribute to a durable, attractive result.
Measuring and Layout Tools
Accurate measurements are one of the most important parts of any flooring project. Before boards are installed, the room must be measured carefully to determine how much flooring is required and how the boards should be positioned. A quality tape measure is essential for measuring room dimensions, wall lengths, doorways, closets, and other areas that may affect the installation.
A carpenter’s square is useful for checking whether cuts are straight and accurately marked. A chalk line can also help installers establish straight reference lines across larger rooms. These reference points are especially helpful when walls are not perfectly straight or when the flooring needs to follow a particular layout.
A pencil or marking tool is another simple but important piece of equipment. Installers use it to mark boards before cutting, identify measurements, and indicate areas that require special attention.
Saws for Cutting Wood Flooring
Saws are among the most frequently used tools during hardwood flooring projects. Since flooring boards rarely fit perfectly around walls, door frames, vents, corners, and other obstacles, installers need reliable equipment for making precise cuts.
A miter saw is commonly used to create accurate crosscuts across flooring boards. It is particularly useful when boards need to be cut to specific lengths. A table saw can be used for long rip cuts, such as trimming boards to fit against walls or other boundaries.
For more detailed cuts, an oscillating multi-tool or jigsaw may be useful. These tools can help installers work around irregular shapes and difficult areas where a standard straight cut is not sufficient.
Flooring Nailers and Staplers
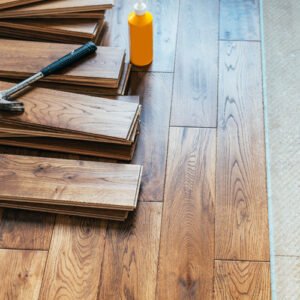
For many solid hardwood floors, specialized flooring nailers are essential. These tools allow installers to fasten boards securely without damaging the visible surface of the flooring. A flooring nailer drives nails or cleats through the tongue of the board at the correct angle.
Pneumatic flooring nailers are commonly connected to an air compressor. They can make installation considerably faster than manually driving every fastener. Manual or mallet-operated flooring nailers may also be used depending on the project and installer’s preference.
Staplers are another option for certain flooring materials and installation systems. The correct fastener depends on the flooring manufacturer’s specifications, board thickness, subfloor, and installation method.
Using the wrong fastener can create serious problems. Fasteners that are too long may penetrate too deeply, while incorrect placement can damage the tongue or prevent boards from fitting together properly.
Pry Bars, Tapping Blocks, and Pull Bars
Not every flooring tool is powered. Several simple hand tools are essential for positioning boards and creating tight joints. A tapping block, for example, allows installers to gently move a board into position without striking the finished surface directly.
A pull bar is particularly helpful when installing boards near walls or in areas where there is not enough room to use a tapping block effectively. It allows the installer to pull a board tightly against the previous row.
Pry bars can also be useful during installation and preparation. They may help remove old flooring, adjust materials, or carefully position boards in challenging locations. However, they must be used carefully because excessive force can damage flooring or walls.
These tools are especially valuable for achieving tight, consistent seams. Even when flooring boards are manufactured precisely, minor adjustments are often necessary during installation.
Spacers and Expansion Gap Tools
Wood flooring naturally expands and contracts as temperature and humidity change. For this reason, installers need to leave an appropriate expansion gap around walls, cabinets, door frames, and other fixed structures.
Flooring spacers help maintain a consistent gap during installation. They are placed between the flooring and the wall so boards do not accidentally become installed too tightly against surrounding surfaces.
The size of the required expansion gap can vary depending on the flooring manufacturer, product type, room conditions, and installation method. Professional installers follow the manufacturer’s requirements rather than relying on guesswork.
Moisture Meters and Subfloor Inspection Tools
A successful flooring installation begins with a suitable subfloor. Before installing wood flooring, professionals may use moisture meters to check the moisture content of the flooring material and subfloor.
Moisture measurement is important because excessive moisture can affect wood flooring after installation. Wood responds to changes in moisture by expanding and contracting, so installing flooring over a damp or unsuitable surface can increase the risk of future problems.
Installers may also use straightedges or levels to identify uneven areas. A flat and stable subfloor provides a better foundation for the finished floor. If significant irregularities are found, they may need to be corrected before installation begins.
Sanding and Finishing Equipment
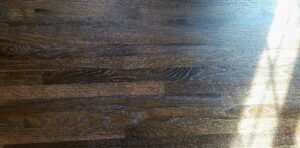
Some wood floors require sanding and finishing after installation, particularly unfinished solid hardwood flooring. A professional flooring project may use several types of sanding equipment to create a smooth, consistent surface.
A drum sander can remove uneven areas and prepare larger sections of flooring. An edge sander is designed for areas near walls and other locations where larger equipment cannot easily reach. Detail sanding tools may be used for corners and difficult areas.
After sanding, installers may use applicators, brushes, rollers, or specialized equipment to apply stain and protective finishes. The type of finish selected can influence the tools and techniques required.
Safety Equipment for Floor Installation
Safety equipment is another essential part of a flooring installer’s toolkit. Cutting, sanding, and fastening wood can create hazards if appropriate protective equipment is not used.
Safety glasses help protect the eyes from sawdust and flying debris. Hearing protection can be valuable when operating loud equipment such as saws, sanders, and compressors for extended periods.
Dust masks or appropriate respirators may also be necessary during sanding and other dusty activities. Work gloves can provide additional protection when handling boards and tools, although gloves should be used appropriately around powered equipment.
Knee protection can make a significant difference because flooring installation often requires installers to work on their knees for long periods. Proper footwear also provides stability and helps reduce the chance of slipping or tripping.
Why Professional Installation Tools Matter
Having the right tools does not automatically guarantee a successful flooring installation. Experience plays an equally important role because every project can present different challenges.
A professional installer knows how to select the appropriate fasteners, cutting methods, layout, and preparation techniques for a particular flooring product. They also understand how environmental conditions, subfloor construction, and room design can influence the installation.
Specialized tools can improve accuracy and efficiency. They help installers create cleaner cuts, maintain consistent gaps, secure boards properly, and complete difficult areas with greater control.
How to Prepare Before the Installation Begins
Homeowners can make the installation process easier by preparing the space before the flooring team arrives. Furniture, personal belongings, and fragile items should generally be removed from the work area according to the installer’s instructions.
The existing floor should also be discussed before the project begins. Depending on its condition and the new flooring system, old flooring may need to be removed, or the existing surface may require preparation.
It is also important to understand acclimation requirements. Some wood flooring products need to be stored in the installation environment for a specified period before installation. The manufacturer’s instructions should always be followed.
Conclusion
A successful wood flooring project depends on more than quality boards. Measuring tools, saws, flooring nailers, spacers, tapping blocks, moisture meters, sanding equipment, and safety gear all have important roles in creating a durable and attractive floor. The exact tools required will depend on the flooring type, installation method, subfloor condition, and whether the material is unfinished or prefinished.
Choosing professional installation can also provide the advantage of specialized equipment and experienced workmanship. If you are planning a flooring project in Firestone, Calabrese Hardwood Flooring can help you understand the preparation and installation requirements for your home. For more information about a wood floor installation service or to discuss your hardwood flooring project, contact Calabrese Hardwood Flooring at +1 720-384-8478.
https://www.spreaker.com/episode/essential-tools-for-wood-floor-installation–74209608
https://www.podomatic.com/podcasts/katherinelyo27podcast/episodes/2026-08-17T07_
https://stream.redcircle.com/episodes/9f660c9f-7090-4e45-b67b-e5cd3a211b57/stream.mp3