Search

What tools are needed for wood floor installation?

Planning a wood floor installation can feel overwhelming, especially if you are unsure what tools are required before starting the project. Whether you are a homeowner upgrading your space or a contractor preparing for a new job, having the right equipment is essential for achieving a smooth, durable, and professional-looking result. The quality of your installation depends not only on the flooring material but also on how well the tools are used throughout each stage of the process.

From measuring and cutting to fastening and finishing, every step requires precision. Without proper preparation, mistakes can lead to uneven boards, gaps, or long-term damage. That is why understanding the essential tools for wood floor installation is so important. In this guide, we will walk through the must-have tools, explain their purpose, and help you feel confident before starting your flooring project.

Essential Tool Overview for Wood Flooring Projects

Every successful flooring project begins with a complete set of essential tools. For wood floor installation, these tools ensure accuracy, efficiency, and long-lasting results. At the most basic level, you will need measuring tools, cutting equipment, fastening systems, and safety gear. Each category plays a unique role in making sure the flooring fits properly and is securely installed.

A tape measure, chalk line, and carpenter’s square are often the first tools used to establish layout accuracy. Power tools such as saws and nailers help speed up the process while improving precision. Without them, installation becomes time-consuming and prone to errors. Adhesives, spacers, and tapping blocks also help maintain consistent spacing between boards.

Having a complete toolkit before starting your wood floor installation prevents interruptions during the project. Professionals often prepare everything in advance to avoid delays and ensure a smooth workflow. Investing in reliable tools not only improves results but also reduces long-term repair costs and installation mistakes.

Measuring and Layout Tools for Accuracy

Accurate measurements are the foundation of any flooring project. During wood floor installation, even the smallest miscalculation can lead to uneven rows or wasted materials. This is why measuring and layout tools are among the most important items in your toolkit.

A high-quality tape measure is essential for determining room dimensions and board placement. A chalk line helps create straight reference lines across large floor areas, ensuring the first row is perfectly aligned. A carpenter’s square is also used to verify right angles, especially around corners and edges where precision matters most.

Laser levels are increasingly popular because they provide fast and highly accurate alignment across the entire room. These tools help maintain consistency throughout the installation process, especially in larger spaces where visual judgment alone is not enough.

Without proper measuring tools, even experienced installers can face alignment issues. Taking time to measure correctly ensures that your wood floor installation begins on a solid foundation, reducing mistakes and improving the overall appearance of the finished floor.

Cutting Tools for Precision and Efficiency

Cutting tools are essential when shaping boards to fit specific room layouts. In wood floor installation, you will often need to trim planks to fit edges, corners, and irregular spaces. Precision is key to achieving a seamless look, and the right tools make this possible.

A miter saw is one of the most commonly used tools for making accurate straight and angled cuts. A table saw is also helpful for ripping boards lengthwise when adjustments are required. For smaller or detailed cuts, a jigsaw provides flexibility and control.

Using sharp blades is important to avoid splintering or damaging the wood surface. Dull blades can lead to uneven edges, which affect the final appearance of the floor. Many professionals also keep a utility knife on hand for minor adjustments or underlayment trimming.

Proper cutting tools not only improve efficiency but also reduce material waste. During wood floor installation, accuracy in cutting ensures that each board fits perfectly, contributing to a clean and professional finish that lasts for years.
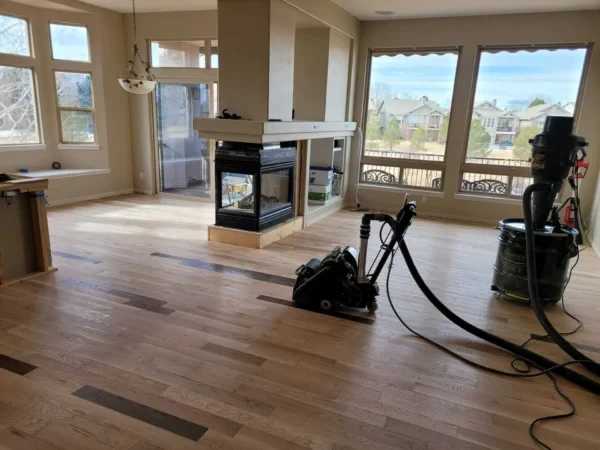
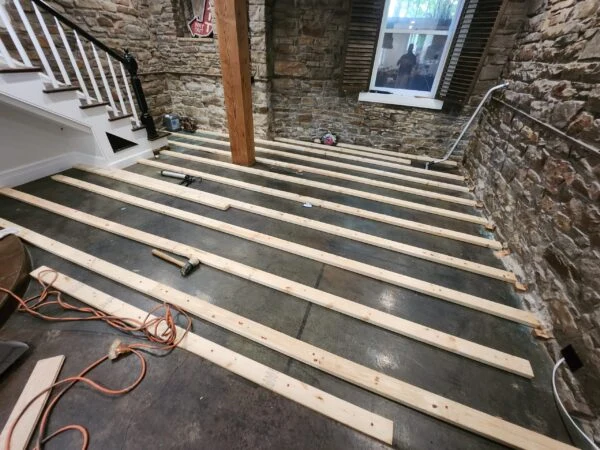
Wood floor installation

Subfloor Preparation Tools for a Stable Foundation

Before laying any boards, preparing the subfloor is a critical step. A clean, level surface ensures the stability and longevity of your flooring. During wood floor installation, subfloor preparation tools help eliminate imperfections that could affect the final result.

Floor scrapers are used to remove old adhesive, paint, or debris from previous flooring. A leveling compound may also be applied using trowels to smooth uneven surfaces. Sanding tools or grinders help correct minor high spots that could interfere with board alignment.

Moisture meters are especially important because excess moisture in the subfloor can damage wood over time. Detecting and correcting moisture issues early prevents warping, swelling, or gaps after installation.

Vacuum cleaners or industrial sweepers are also essential for keeping the surface clean before installation begins. A properly prepared subfloor ensures that your wood floor installation remains stable, durable, and visually appealing for many years without unexpected structural issues.

Fastening and Adhesive Tools for Secure Installation

Securing the flooring properly is one of the most important steps in any installation project. In wood floor installation, fastening and adhesive tools ensure that each board stays firmly in place while allowing natural expansion and contraction.

A flooring nailer or stapler is commonly used to attach hardwood boards to the subfloor. These tools provide consistent pressure and spacing, making installation faster and more accurate than manual nailing. For glue-down installations, high-quality flooring adhesive and a notched trowel are essential for even application.

It is important to apply adhesives evenly to avoid air pockets, which can lead to uneven surfaces over time. Some installers also use pneumatic tools to increase speed and reduce physical strain during large projects.

Proper fastening ensures long-term durability and prevents movement or squeaking. Without reliable fastening tools, a wood floor installation may become unstable, leading to costly repairs and reduced lifespan of the flooring system.

Underlayment and Moisture Barrier Materials

Underlayment plays a crucial role in protecting both the flooring and the subfloor. During wood floor installation, it acts as a cushioning layer that improves comfort, reduces noise, and enhances durability.

Common underlayment materials include foam, cork, or rubber-based products. These materials help absorb sound and create a smoother walking surface. In addition, moisture barriers such as plastic sheeting or specialized films prevent water vapor from reaching the wood, which is especially important in humid environments.

A utility knife is often used to cut underlayment to fit the room dimensions precisely. Seam tape is also used to secure overlapping sections and ensure full coverage.

Wood floor installation

Safety Equipment for a Secure Working Environment

Safety is often overlooked but is essential during flooring projects. A proper set of protective equipment ensures that wood floor installation is completed without injuries or hazards.

Safety goggles protect your eyes from dust and flying debris during cutting and sanding. Work gloves help prevent splinters and improve grip when handling boards or tools. Ear protection is also important when using loud power tools such as saws and nailers.

Dust masks or respirators are recommended when working in enclosed spaces, especially during sanding or subfloor preparation. These tools help protect your respiratory system from fine particles and wood dust.

Installation Accessories for Precision and Alignment

Installation accessories may seem minor, but they play a major role in achieving a professional finish. During wood floor installation, items like spacers, tapping blocks, and pull bars help maintain proper alignment between boards.

Spacers are placed along the walls to maintain expansion gaps, which are necessary for natural wood movement. Tapping blocks and mallets help fit boards tightly together without damaging edges. A pull bar is useful for securing boards in tight or hard-to-reach areas.

These tools ensure that each row remains consistent and properly aligned throughout the installation process. Without them, gaps or uneven spacing may appear, affecting the overall appearance and durability of the floor.

Finishing and Post-Installation Tools

After the flooring is installed, finishing tools are used to complete the project and enhance durability. In wood floor installation, this stage ensures the surface is smooth, protected, and visually appealing.

Sanders are often used to smooth out minor imperfections and create an even surface. Buffing machines can also help refine the finish before applying protective coatings. Depending on the type of wood, sealants, stains, or polyurethane finishes may be applied using rollers or applicators.

Vacuum systems are essential for removing dust before finishing products are applied. Clean surfaces ensure better adhesion and a more polished result. Microfiber mops are also used for final cleaning.

Conclusion

A successful flooring project depends on preparation, precision, and the right equipment. From measuring and cutting to fastening and finishing, every stage requires specific tools to ensure quality results. Understanding these essentials makes any installation more efficient and professional.

For homeowners and contractors seeking expert help, Calabrese Hardwood Flooring in Firestone offers reliable service and professional craftsmanship. With the right tools and expertise, your flooring project can achieve lasting beauty and durability. For inquiries or consultations, contact +1 720-384-8478 to get started on your next project.


https://www.spreaker.com/episode/what-tools-are-needed-for-wood-floor-installation–72990752

https://www.podomatic.com/podcasts/katherinelyo27podcast/episodes/2026-07-15T06_22_57-07_00

https://stream.redcircle.com/episodes/4e5dff62-7b5f-482a-80ab-3e8f369f38b1/stream.mp3